Publish, import, or update assets in a workspace – Deploy and maintain assets
Publish, import, or update assets in a workspace
You can publish a report to the Power BI service from Power BI Desktop by selecting Publish on the Home ribbon. To publish a report from Power BI Desktop, you must be signed in. By default, your report will be published to your personal workspace, unless you already published to another workspace in the same session. If you are a contributor in other workspaces, you can select a workspace to publish to.
If the workspace you are publishing to already contains a dataset with the same name, you will be asked if you want to replace it, and you’ll see how many workspace items it affects, as shown in Figure 4-15. This feature can be particularly useful when you’re updating a dataset that has other reports built from it.
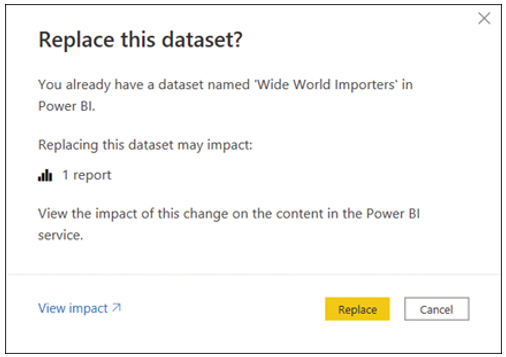
FIGURE 4-15 Dataset impact.
An alternative to publishing from Power BI Desktop is to publish from the Power BI service by going to a workspace and selecting New > Upload a file. You’ll be given a choice to publish a local file, a file from OneDrive, or a file from SharePoint, as shown in Figure 4-16.
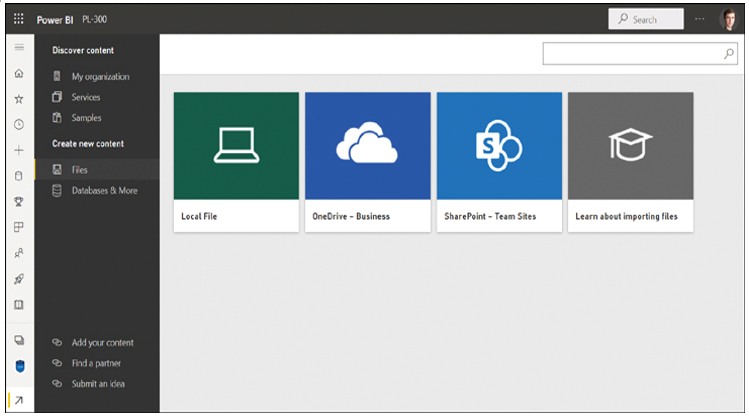
FIGURE 4-16 Creating new content from files.
Selecting Local File will prompt you to select a file from your computer to publish, whereas OneDrive and SharePoint options allow you to publish from the cloud. Publishing from OneDrive can be beneficial because you can edit a report locally in Power BI Desktop in a folder that’s synced to OneDrive, and it will be published automatically upon saving and closing the file because Power BI can sync published files from OneDrive.
Apply sensitivity labels to workspace content
Within an organization, different data may have different security levels. For example, some data must not leave a specific department, and other data may be shared publicly. To help users understand the sensitivity level of workspace content, you can apply sensitivity labels.
Note Enabling Sensitivity Labels
For users to be able to apply sensitivity labels, they must be enabled in Power BI admin portal tenant settings, typically by the central IT department in the organization. The admin portal is out of the scope of the exam. For more information, see “Enable sensitivity labels in Power BI” at https://docs.microsoft.com/en-us/power-bi/admin/service-security-enable-data-sensitivity-labels.
When information protection is enabled in your Power BI tenant, you can set a sensitivity label for a workspace item in the following way:
Go to the settings of a workspace item.
Select a sensitivity label from the dropdown list under Sensitivity label.
Optionally, check Apply this label to the dataset’s downstream content or similar.
Select Apply or Save.
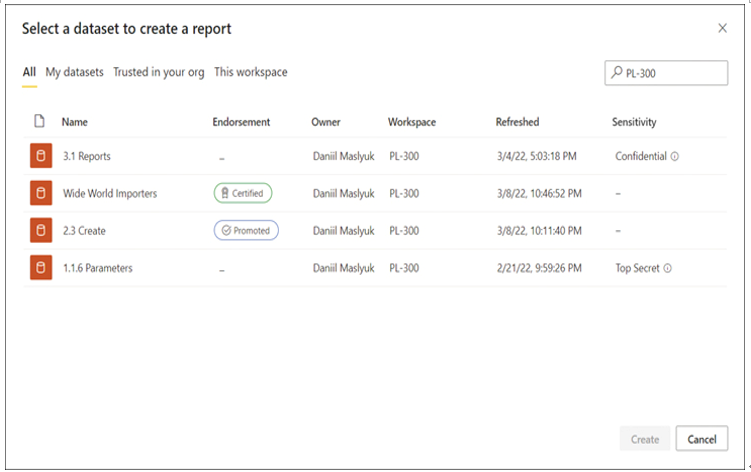
After you set a sensitivity label, it will be displayed when anyone views the item, as well as in the list of workspace contents, as shown in Figure 4-17.
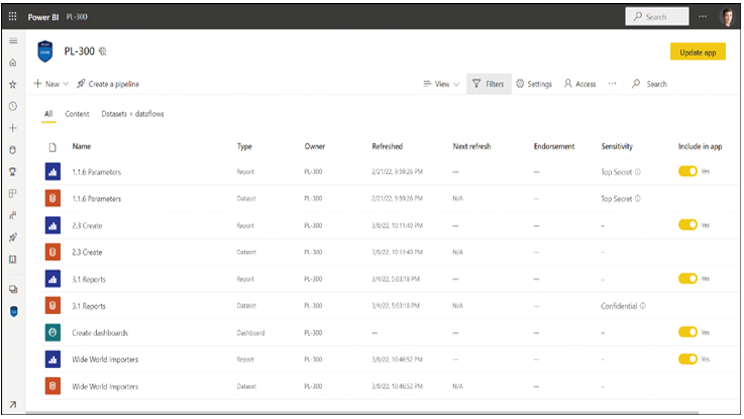
FIGURE 4-17 Sensitivity labels.
Note how two reports have sensitivity labels shown in the Sensitivity column. If you hover over a sensitivity label, you’ll see its description.